 Interior Paints
 Exterior Paints
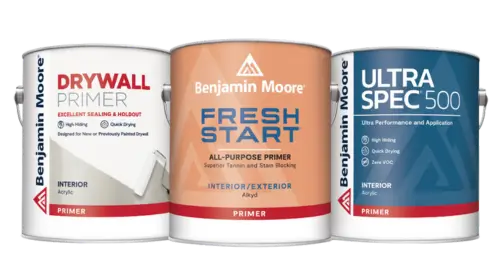 Primers
 Stains & Clears
 Paint Brushes
 Paint Roller
 Paint Trays & Liners
Before you paint, you have to prep. Follow these steps to do it right.
By Diane Franklin
Any painting pro will tell you—the difference between a so-so painting job and an excellent one is in the prep. You can use the same quality paint and the same quality paint applicators, but if you skimped on the prep work, your final results will tell the tale. If there are imperfections in the wall, they will show through even the best paint job, so be sure to take care of those before you paint.
Here are the steps you should take to ensure you do paint prep the right way.
Preliminary Moves
- Before painting, remove as much furniture as possible or place it in the center of the room.
- Use drop cloths to protect floors, baseboard and trim.
- Remove switch plates, outlet covers and (if painting the ceiling) light fixtures. Bonus tip: Place screws in a small storage bag and tape the bag to the backs of these items to ensure that you can find them when it is time to reattach them to the walls.
Clean the Walls
- For most walls, you can clean off dirt and dust with a sponge and warm water. Use a mild detergent as needed, then rinse the walls clean. Allow to dry before painting.
- Kitchens may be more difficult to clean, since cooking may have allowed greasy build-up to accumulate on the walls. In that case, use warm water and a grease-cutting detergent to remove grime. Afterwards, wipe the walls down with a damp cloth. Allow to dry before painting.
- Don’t overlook cobwebs in the corners; typically you can use a broom or a dust mop for hard-to-reach areas.
- Take special care to clean around doors, windows and baseboards. These are areas where dust can accumulate. They’ll need to be clean of dust so that painter’s tape will adhere to them.
- Use the crevice attachment of your vacuum cleaner to clean the floor near baseboards to ensure that dust, pet hair, etc. won’t be a problem when you go to paint.
- If mildew is present, you’ll have to take additional precautions to get rid of it. Never paint over mildew—it will grow through the new paint. Use four parts water with one part household bleach. Use gloves and googles to protect your skin and eyes. Wipe on the solution with a large sponge, and let it sit for a few minutes. Rinse the area with clean water and allow to dry.
Sand and Scrape
- Use sandpaper or a sanding block to smooth out uneven surfaces or imperfections in the wall. Wipe away dust with a damp cloth and let dry thoroughly.
- Use spackling compound to fill in holes or cracks as needed. Wait for the compound to dry before sanding.
- If your wall was previously painted with a gloss or high-gloss paint, sand the entire wall to ensure better adhesion of the new paint.
- If sanding proves to be extensive or difficult, consider the use of an electric sander.
- If your previously painted walls have cracking or flaking paint, sand or scrape to remove those areas. Otherwise, they will show through your new paint job and mar the finish.
- Remove the residue after any sanding job with a vacuum or wet cloth.
Should You Prime?
- Always prime when painting new drywall. If the wall has already been painted, you don’t need to prime if the walls are in good shape.
- If the walls have unsightly stains or multiple patches, prime the wall. For difficult stains, use a stain-killing primer.
- Other reasons to prime: if you’re concerned about adhesion, if you’re painting over glossy surfaces, and if you’re concerned about coverage over a dark surface.
- Use paint-and-primer-in-one if it’s the most economical and quality solution for your walls.
Let’s Go to the Tape!
- Use a quality painter’s tape to protect baseboards, doorjambs and windows. As stated above, make sure these surfaces are clean to ensure good adhesion of the tape.
- Let the tape sit for about 30 to 60 minutes before painting.
- Use delicate tape if adhering to a newly painted surface such as a ceiling or adjacent wall in a different color.
- Let the paint dry for an adequate amount of time before removing the tape. At minimum, this is when the paint is dry to the touch, but you can also wait until the paint dries overnight. For multiple coats, leave the tape in place until the final coat is dry.
- Many painter’s tapes will specify how long the product can be left on the surface and still permit clean removal—14 days, 21 days, etc. If you anticipate needing to leave the paint on the surface for several days (because of multiple coats or an intricate faux finish), consider using one of these products.
- Remove the tape at a 45-degree angle, moving slowly so as not to inadvertently pull off the paint. If you’re concerned about the paint coming up with the tape, carefully use a razor blade or utility knife to score the edge of the tape.