
 Interior Paints
 Exterior Paints
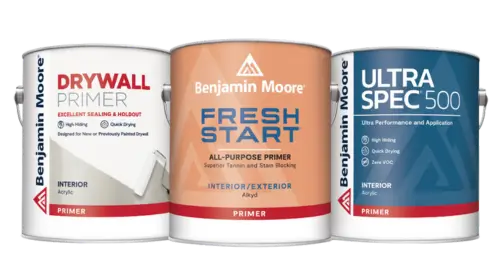 Primers
 Stains & Clears
 Paint Brushes
Want to paint like a pro? Follow these proven steps.
By Diane Franklin
Painting is one of the top DIY home improvement projects, but don’t assume that you’ll be able to paint like a pro without doing a bit of self-education. Painting well requires using the right products and the right techniques. If you follow these tips, you should be able to achieve superior results.
1. Go for the Quality.
Take this No. 1 tip from the pros: When trying to achieve a quality paint job, use both a quality paint AND quality tools. Quality paint does cost more, but every dollar you spend will be evident in the final results. With quality paint, you’ll get a better finish, better coverage, greater durability and a product that is easier to apply with less splatter and mess.
However, quality paint will not be worth the money if you apply it with inferior tools. The best paint application is achieved with first-rate paintbrushes and rollers. When looking at paint applicator displays arranged as “good, better, best,” you should have no hesitation about picking the best. And if there is a professional line of paintbrushes, you may want to spend the few extra dollars to truly paint like the pros by choosing their favored tools.
2. Start with Good Surface Prep.
Some experts estimate that surface prep is about 90% of the paint job. Surface prep entails cleaning the walls, patching any holes and filling in any surface blemishes with spackling compound.
A thorough cleaning of the walls is required to make sure they are free of dust, dirt and cobwebs that could mar a paint job. Use a mixture of mild detergent and warm water to clean any grease or grime from the walls.
Use a paint scraper to remove any small patches of peeling paint. Important exception: For those who live in homes built prior to the 1978 ban of lead in paint, do not attempt to remove the paint if you suspect that the paint currently on your walls has lead. Contact a contractor qualified for the removal of such paint.
Use caulk as needed to fill gaps around tubs and tile, kitchen sinks, windows, doors, molding, etc. Follow the label to determine how long the caulk must dry before you are ready to paint.
During prep, make sure you measure the square footage of the area you intend to paint (minus windows and door openings). You want to ensure that you buy enough paint so that you don’t have to stop and re-start your paint project. One gallon of paint will cover up to 400 square feet, but keep in mind that you may need to do two coats. For instance, if you’re painting a light color over a darker color, you almost certainly will need more than one coat.
3. Protect Your Surfaces
To ensure that paint ends up on only the surfaces you want painted, take the time to remove or protect everything else in the room. Move or cover furniture and remove switchplates and outlet covers. Use drop cloths that will not slip or pull away from the wall.
As with paint and painting tools, spend a few extra dollars to buy quality painters’ tape to protect baseboards, doorjambs and windows. The best tapes will remove cleanly and will not allow paint to seep underneath, thus ensuring a better-looking final result.
4. Think About a Primer
There’s a general consensus that it is not necessary to prime your wall if you are doing a simple repaint of a room in which the existing paint is already in good shape. Two coats of a quality paint should work out just fine. However, if the walls have unsightly stains or you have patched in multiple places and want to ensure an even topcoat, priming the wall is an excellent idea. Priming also makes sense if you are concerned about adhesion or are covering over glossy surfaces or dark colors. The primer provides all of those qualities and will ensure that the topcoat looks its best.
It’s become standard in the industry for paint brands to offer a paint-and-primer-in-one product. This is a substitute for a primer alone. However, if painting new drywall, using a primer first can be a more economical solution than going with a paint-and-primer-in-one for the first coat.
5. Use Good Techniques
Now you’re ready to paint! If painting the entire room, always start at the top. Paint the ceiling first, then the walls and finally the trim. Use painter’s tape to protect the newly painted surfaces as you go, but be sure to buy the appropriate product for newly painted surfaces.
When painting edges, use a paintbrush and dip it about a third of the way into your paint can or paint cup. Paint with smooth strokes, feathering out the edges. When painting with a roller, use a roller pan with a liner for easy cleanup. An alternative is to use a 5-gallon bucket with a roller grid.
Be careful when using a roller not to oversaturate the cover. Starting near the edge of the surface, roll the paint in a zig-zag pattern, then roll in several directions to fill in until the surface is well covered. Reload as needed—don’t try to “stretch” the paint by pushing the roller too hard on the wall. Work in 4-foot sections, top then bottom. Turn the roller sideways as needed to get close to ceiling and baseboards. Lightly roll down over the painted areas to remove build-up and runs.
Make sure you let the wall completely dry between coats. Wait the allotted time, according to manufacturer’s instructions, before removing painter’s tape. Clean your quality paint tools so that they’ll be ready for your next project. Remove drop cloths, reattach switchplates, and stand back to admire your lovely, newly painted room.